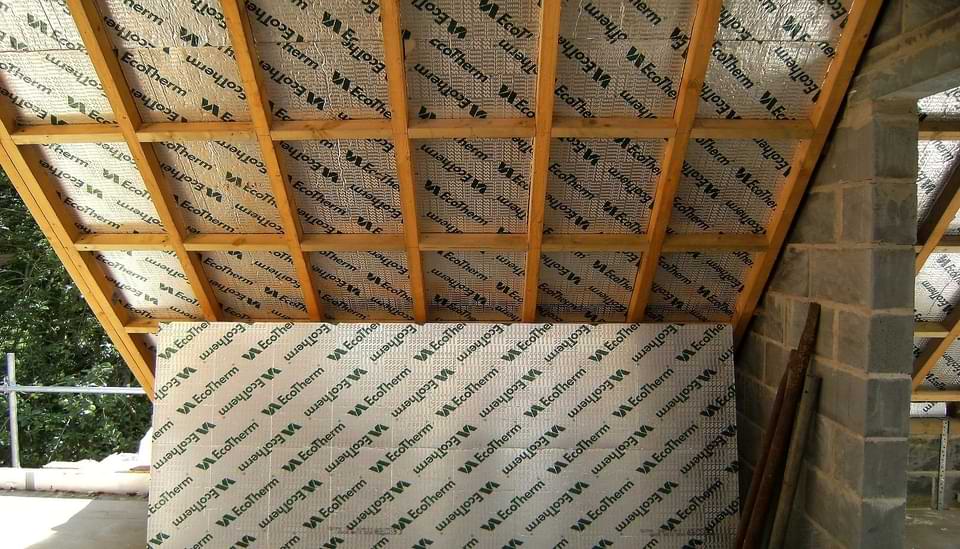
If you’re looking into installing insulating roof panels yourself or hiring professional installers, knowing how to install insulation under metal roofing will help you in the long run either way. For example, it can help you do your job more efficiently or help you supervise and assess the work completed by hired tradies.
You’ll need some wisdom and expertise from professional roof insulation installers to guarantee an effective outcome. So, before you do anything else, check out our tips and tricks so you can make the most out of your installation job.
What Insulation Is Used for Roofs?
There are just as many materials to use as there are ways of insulating your roof. Choosing the perfect material is about more than just getting the right type; you need to determine the correct R-value and measurement. We’ll take you through this below.
#1: Choose an Insulation Type Best for You
There’s a variety of insulation choices available in the market; the best one depends on your needs, budget, and preference. But when it comes to metal roofing, insulation types such as foam batting, foil, and fibreglass are your best bet! And if you’re going to be installing them yourself, foam batting is the most DIY-friendly material. Choose those with high R-value ratings to guarantee greater thermal resistance to heat flow.
#2: Determine the Right R-Value
R-value is the metric for rating each insulation material’s resistance to heat flow. Generally, the higher the R-value, the more resistant your insulation is. You can determine the R-value for your home depending on your climate. Colder climates will require a higher R-value to prevent heat loss during the winter.
Some materials tend to have lower R-values. Foam batting, for instance, will have a lower R-rating, so you’ll need to use two layers in colder areas.
#3: Measure How Much Material You Need
To determine how many square metres of insulation you’ll need to multiply your roof’s length by its width. Note that rolls are suitable for long, continuous runs when buying insulation, while batts are best for smaller spaces.
How to Install Insulation Under Metal Roofing
Now that you’ve determined which insulation material to use, it’s time to move on to the installation steps.
#4: Prepare Your Roof
As with everything in life, if you want to know how to install insulation under existing metal roofing, you need to prepare. Before you can begin removing the existing insulation, you will need to remove the roof, unless you are installing ceiling batts. You can then remove the existing insulation, including any that has become compressed or mouldy. Make sure you take care of any mould problems before installing the insulation. If you see any signs of roof damage, it’s better to call a professional. Otherwise, your new insulation may be ruined or prove less than effective.
#5: Seal Gaps
The next step is to seal air gaps to prevent heat from escaping utilities and fixtures. Apply some spray foam to close large gaps around pipes or light fixtures. While for smaller spaces like electrical boxes and other utilities, caulk is more suitable.
#6: Check the Lights
You’ll need to inspect your recessed lights and see if they’re rated Type-IC. This means they’re acceptable for insulation contact. If the lights are not rated Type-IC, you’ll need to replace or keep the insulation away from the fixture to avoid any fire hazards.
#7: Lay Insulation on Paper Liners
The first step and often the most neglected part of roof installation is the paper liner. Laying down paper wrap prevents water build-up. The paper liner must be placed where mould can quickly grow, such as between the insulation, sheathing, and metal roof.
#8: Install With Staples
One of the best hacks for installing metal roof insulation is to use 3.8cm (1.5 inch) staples. They will easily go through multiple insulation sheets and ensure they are secure. They also do not make large holes and you’ll have an easier time removing them when repairs are needed.
#9: Leave Gaps Between Panels
When it comes to roof insulation, ventilation is essential. It helps if you have gaps or channels between insulation pieces to let air flow and prevent moisture building up. Ideally, you should allow 30mm gaps (about an eighth of an inch).
#10: Cut Panels on the Roof
For more accurate cuts and faster placements, we recommend cutting your panels right on the roof. You can carry all your materials up there before you start anything, so you’ll minimise your need to go up and down for tools, pieces of insulation and taking measurements. Ensure you can do it safely, however. Saving time is not as important as your health and safety.
Make Sure Your Roof Is Up to Scratch
As you or your insulating contractors get to work, you may notice that your roof has seen better days. If this is the case, then you need to call KC Roof Plumbing. With substantial experience working across a range of roofing projects from classic homes to architectural innovations, KC Roof Plumbing can erect the perfect roof for your home.


Comments are closed.